

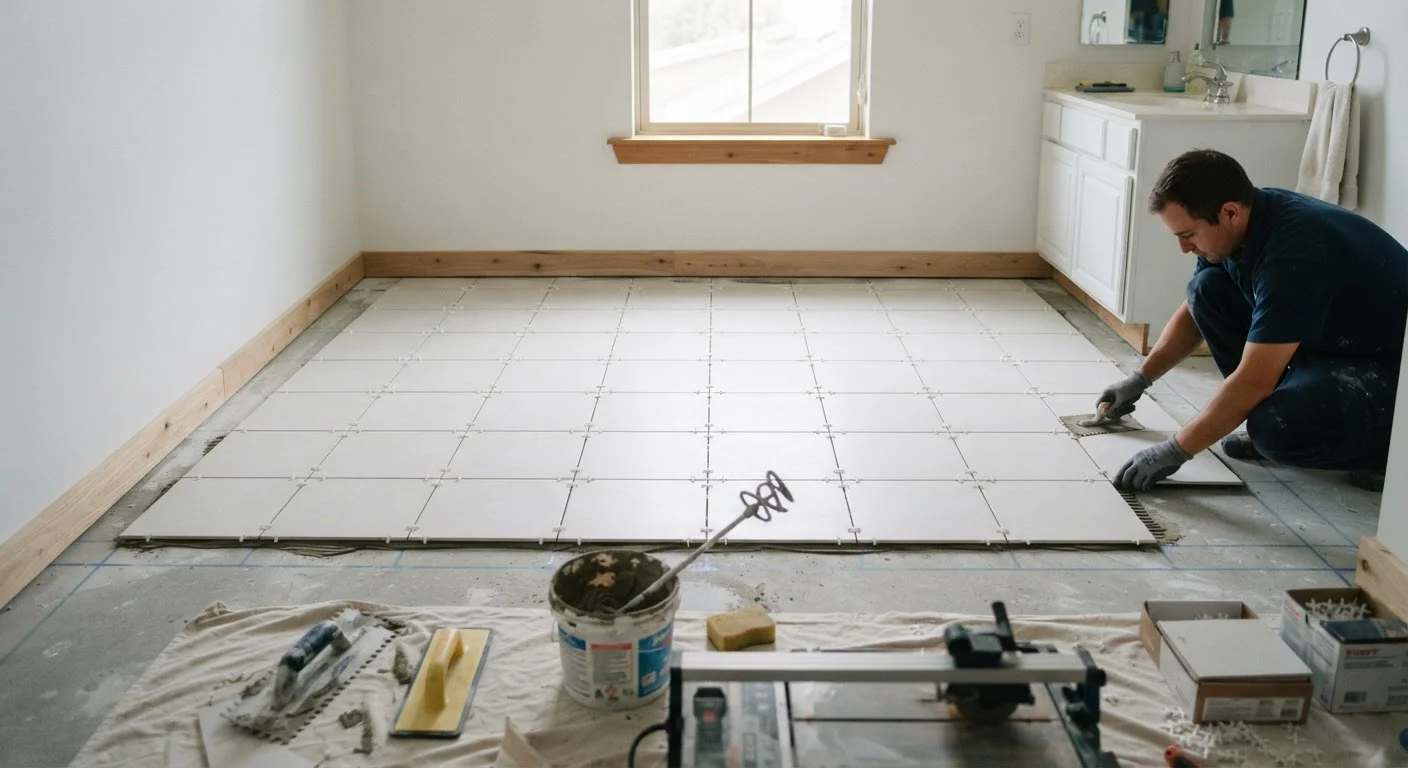
Why Surface Prep Determines Everything
Most tile failures - cracked tiles, popped grout, lifting edges - do not happen because of the tile itself. They trace back to what was done (or skipped) before installation began. Tile is a rigid material bonded to a rigid surface, and any movement, moisture intrusion, or unevenness in the substrate will eventually telegraph through to the finished surface.
The substrate beneath bathroom tile must be structurally sound, dimensionally flat, and moisture-resistant. In a bathroom, that usually means cement board or a comparable backer on walls, a properly stiffened subfloor, and a waterproof membrane wherever water will regularly land. If your project involves changes to framing, plumbing rough-ins, or load-bearing elements, consult a licensed contractor and check whether local permits are required before proceeding.
Check for Flex Before You Begin
Tile will crack over any subfloor that has visible bounce or flex underfoot. The industry standard for floor tile is a maximum deflection of L/360 - meaning the floor should deflect no more than 1/360th of the span length under load. If your subfloor moves noticeably when you walk on it, add blocking between joists or an additional layer of plywood before proceeding.
Understanding what can go wrong before you start is also good financial practice. Our guide to keeping renovation budgets on track covers the planning habits that prevent costly mid-project surprises.
Notched trowel
Spreads thin-set mortar at the correct depth and coverage for the tile size being installed.
Tile wet saw
Makes clean, precise cuts through ceramic, porcelain, or stone tile at any angle.
Level and straightedge (48 inches or longer)
Checks substrate flatness and keeps tile rows aligned during installation.
Chalk line
Snaps reference lines on the substrate to guide layout and keep rows square.
Tile spacers
Maintains consistent grout joint width across the entire installation.
Grout float
Presses grout into joints and removes excess from the tile surface.
Rubber mallet
Taps tiles into the mortar bed without cracking them, ensuring even seating.
Margin trowel
Mixes and applies thin-set in tight spaces and back-butters individual tiles.
Layout, Installation, and Finishing
Once the substrate is confirmed solid and properly prepared, the focus shifts to planning where every tile will land - before any mortar is mixed. A thoughtful layout centers the visual composition of the room, hides unavoidable cut tiles in low-visibility areas, and ensures that grout lines are straight and consistent from every angle you'll see them from daily.
Waterproofing Is Non-Negotiable in Wet Areas
Shower walls and floors require a dedicated waterproof membrane beneath the tile - cement board alone is not waterproof. Skipping this step allows moisture to reach the framing, leading to mold, rot, and costly structural repairs. Apply a sheet membrane or liquid-applied waterproofing product rated for wet areas, following the manufacturer's overlap and seam-sealing instructions precisely.
The step-by-step process below walks through the full sequence from substrate assessment to final sealing. If you decide at any point that the scope exceeds your comfort level - particularly for shower waterproofing or structural repairs - the homeowner's contractor vetting checklist can help you find and evaluate qualified professional help.
Assess and repair the substrate
Inspect the existing subfloor or wall backing for soft spots, rot, or damage. Press firmly across the entire surface and listen for hollow sounds or movement. Replace any damaged sections of plywood or drywall before continuing. On floors, the substrate must be flat to within 1/8 inch over a 10-foot span - use a floor-leveling compound to fill low spots and sand down high ridges. On walls, remove standard drywall in wet zones and replace it with cement board or an equivalent tile backer rated for moisture exposure.
Apply waterproofing in wet zones
In showers and around tub surrounds, install a waterproof membrane over the cement board before any tile goes down. For sheet membranes, embed the fabric in unmodified thin-set and overlap seams by at least 2 inches. For liquid-applied systems, apply two coats with a roller or brush, allowing the first coat to cure fully. Pay particular attention to corners, seams, and where the floor meets the wall - these transitions are the most common failure points.
Plan your layout with a dry run
Find the visual center of the room or the most prominent wall. Snap two perpendicular chalk lines through that point using a framing square to confirm they are truly 90 degrees. Dry-lay a row of tiles with spacers along each reference line to see how the field plays out. Adjust the layout so that cut tiles at opposite walls are roughly equal in size and that no cut tile falls narrower than half a tile width at a focal point such as a doorway or vanity.
Mix and apply thin-set mortar
Select a thin-set rated for your combination of tile type and substrate - large-format tiles and natural stone typically require a medium-bed mortar or a polymer-modified formula. Mix thin-set to a smooth, peanut-butter consistency using a drill and mixing paddle; it should hold a notch without slumping. Apply mortar to the substrate with the flat side of the trowel first, then comb it with the notched side at a consistent 45-degree angle. Work in sections no larger than you can tile in 15-20 minutes before the mortar skins over.
Set tiles and back-butter as needed
Press each tile firmly into the mortar with a slight twisting motion to collapse the ridges and achieve full contact. For tiles larger than 15 inches on any side, also back-butter the tile itself with a thin coat of mortar. Place spacers at each corner as you go. Periodically lift a just-set tile and check the back - mortar coverage should be at least 80% in dry areas and 95% in wet areas. Use a rubber mallet and a beating block (a scrap of plywood) to level tiles to one another without damaging edges.
Allow full cure before grouting
Let the thin-set cure for a minimum of 24 hours - or 48-72 hours for large-format tile or natural stone - before walking on the installation or applying grout. Remove all spacers while the mortar is still slightly workable if possible, then allow the remaining cure time. Grout applied too soon can disturb tiles and weaken the bond below.
Mix, apply, and clean grout
Choose sanded grout for joints wider than 1/8 inch and unsanded grout for narrower joints. Mix to a firm, lump-free consistency and allow it to slake (rest) for 5-10 minutes before a final stir. Pack grout into joints firmly with a grout float held at roughly 45 degrees to the tile surface, working diagonally across the joints. Remove excess by dragging the float across the tile at a steep angle. After 15-20 minutes, wipe the tile surface with a damp sponge using circular motions, rinsing frequently. Buff off the haze with a dry cloth once the grout has stiffened.
Seal grout and caulk movement joints
Once grout has cured fully - typically 48-72 hours - apply a penetrating grout sealer according to the product directions. Sealer reduces moisture absorption and staining, particularly in floor grout joints. Do not use grout in corners, changes of plane (floor-to-wall transitions), or around fixtures - these are movement joints that must be filled with a flexible, mildew-resistant silicone caulk matched to the grout color. Grout in these locations will crack as the structure moves seasonally.
Order More Tile Than You Think You Need
A 10% overage covers cuts, breakage, and future repairs. If your tile is from a specific production run (called a dye lot), replacing it later with an exact match is rarely possible. Keep a box of leftover tile stored flat in a dry location in case a tile cracks years down the road.
Tile is one of several flooring options suited to bathrooms. If you're still deciding between materials, comparing hardwood, laminate, and luxury vinyl by room offers a useful side-by-side perspective on durability and moisture performance.
The content on this site is provided for informational purposes only and should not be considered a substitute for professional advice. While we strive to provide accurate and up-to-date information, we make no guarantees regarding its completeness or accuracy. Always consult a qualified professional for advice specific to your circumstances before making any decisions.